Repointing & tuckpointing
Chimney repointing across the South Shore
Mortar is designed to fail before the brick does. Repointing is the repair that takes advantage of that — provided the new mortar is the right mortar, which on a pre-1940 New England chimney it very often is not.
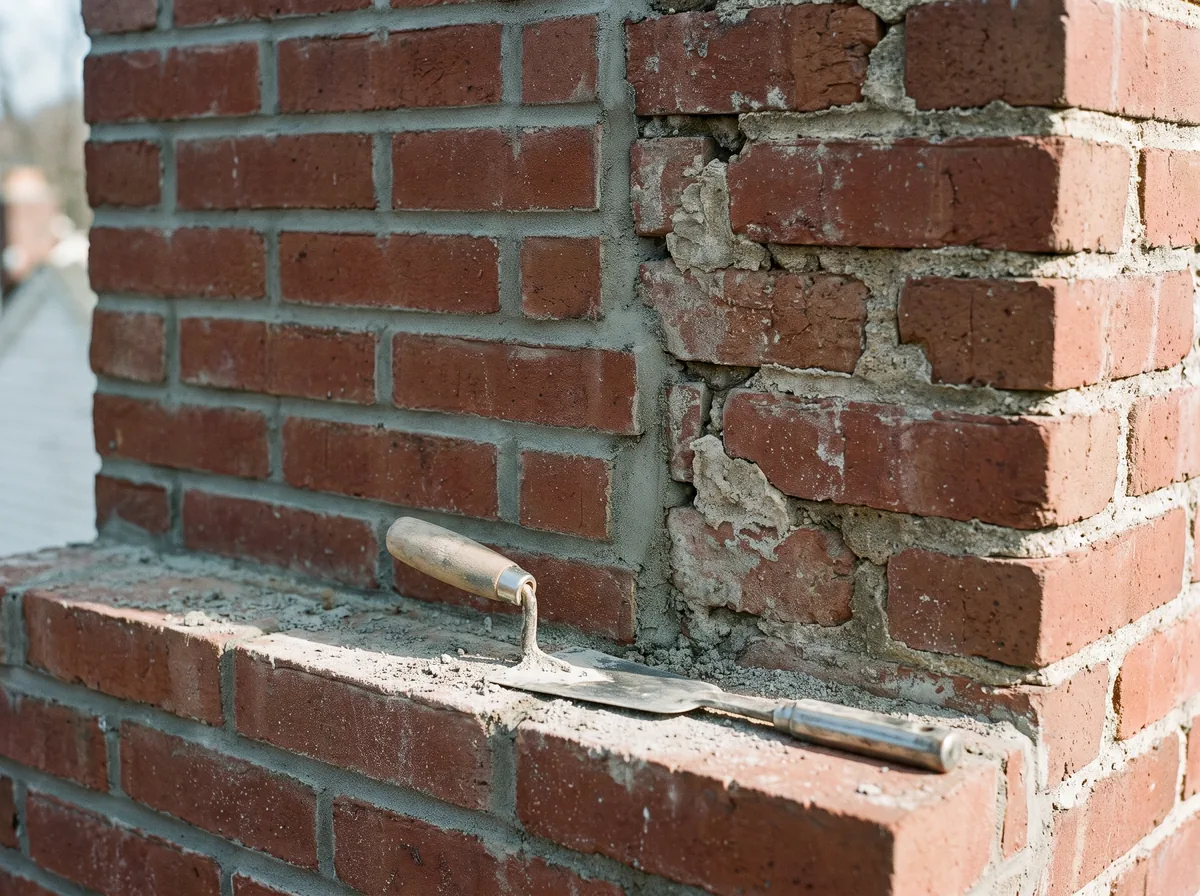
Repointing is the removal of deteriorated mortar from the joints between bricks and the packing of those joints with new mortar. In the New England trade the words repointing and tuckpointing are used interchangeably, and we use them that way here. Strictly, tuckpointing once described a decorative technique using two mortar colours to fake fine joints; nobody on a South Shore roof means that when they say it. Both words mean the same job: cut the bad mortar out, put good mortar back in.
What makes this worth understanding rather than just buying is that mortar is not a weaker version of brick that failed to live up to it. Mortar is deliberately the weakest part of the wall. It is specified softer than the masonry units it beds, because a brick wall is not a rigid object — it moves with temperature, with moisture, with the settlement of whatever it is sitting on. That movement has to be absorbed somewhere. If the mortar is the softest element, the movement is absorbed in the joints, and the joints are the part you can cut out and replace with a grinder and a trowel. If the mortar is harder than the brick, the movement is absorbed in the brick faces instead, and brick faces are not replaceable without dismantling the chimney.
So mortar is sacrificial by design. It is supposed to erode. A chimney whose joints have receded a quarter inch over sixty years has not failed; it has done exactly what it was built to do, and it is telling you it is time for the maintenance cycle that was always part of the plan.
Done properly, the repair is straightforward and mechanical. The joint is raked out to a minimum depth of three quarters of an inch — not scratched at the surface, not skimmed over. All loose and friable material is removed with a grinder or an oscillating tool and the dust blown or brushed out, because new mortar packed against old dust bonds to the dust rather than to the brick. The joint is dampened. New mortar is packed in tight, in layers if the joint is deep, and then tooled to match the original joint profile — concave, weathered, flush, raked, whatever the mason originally struck. The profile is not decoration. A weathered joint sheds water off its outer edge. A raked joint holds a shelf of water against the brick. Matching it matters.
The mortar question that decides whether the repair works
This is the part almost nobody explains, and it is the single most consequential decision in a repointing job on the older half of the South Shore housing stock.
Homes built before roughly 1940 in New England were laid up with lime-based mortars — soft mixes, Type O or weaker, with little or no Portland cement in them. The brick of that period was fired soft too. Bricks from a nineteenth- or early twentieth-century yard are more porous and considerably more flexible than a modern extruded face brick. The wall was conceived as a soft, slightly yielding, breathable assembly: water that got in could get back out, and small movements were taken up across hundreds of forgiving joints.
Modern Portland-cement mortars — ASTM C270 Type S and Type M — are a different material entirely. They are hard, rigid, dense and largely impermeable. They are excellent mortars for the concrete-block and hard-fired brick they were developed for. Put them into a pre-1940 chimney and two things happen, both bad.
First, the joint stops breathing. Moisture that enters the masonry — and it always does, through the crown, through wind-driven rain, through the brick face itself — used to leave through the joints, which were the most permeable path. Seal that path with dense Portland mortar and the moisture leaves through the only route remaining, which is the face of the brick. Every freeze then happens inside the brick rather than inside the joint.
Second, the stress relief is gone. The hard joint no longer yields. Thermal and moisture movement that used to be absorbed harmlessly in the mortar is now forced into the softest thing in the assembly, which is the brick. The result is spalling — the face of the brick shearing off in flakes and plates — on a chimney that was structurally fine before someone repointed it. It is one of the more dispiriting things in this trade, because the homeowner paid for the repair that caused the damage, and the damage usually shows up three to eight winters later when nobody connects the two events.
The correct specification for pre-1940 New England brick is mortar matched to the original in hardness, not just in colour. In practice that means an ASTM C270 Type N — a portland, lime and sand blend, substantially softer than Type S — or, on genuinely early work, a pure lime mortar. The principle is simple and old: the mortar must always be the weakest link. Any mason who reaches for Type S on a hundred-year-old chimney because it is what is on the truck is choosing convenience over the building.
This is not an abstract concern on the South Shore. Quincy built out between roughly 1895 and 1940 along the streetcar and Old Colony Railroad lines — Wollaston, North Quincy, East and West Quincy — with two-family and triple-decker housing carrying brick chimney stacks that are now a century old and laid in lime mortar. North Plymouth's Cordage-era worker housing is the same vintage and the same construction. Downtown Plymouth goes back considerably further, with antique homes whose chimneys were built before Portland cement was commercially available in this country at all. Hingham Centre and Cohasset carry comparable pre-1900 stock. On any of these, ask what mortar is being specified and why before you accept a quote.
Why chimney mortar weathers faster than anything else on the house
Homeowners are often surprised that the chimney needs repointing when the brick veneer on the front of the house, laid the same week by the same mason, looks fine. The chimney is simply in a worse place.
A wall is exposed on one side. A chimney above the roofline is exposed on four sides and on top, at the highest point of the building, where wind speeds are greatest and wind-driven rain is driven hardest. Rain that runs harmlessly down a sheltered wall is pushed horizontally into chimney joints. There is no overhang, no soffit, no adjacent structure taking the weather. Sun exposure is total, so the thermal cycling is wider than anywhere else on the building. And the chimney has a heat source running up the middle of it, which means the masonry dries and expands from the inside on a schedule of its own.
Then add the climate. Eastern Massachusetts crosses the freezing point somewhere between 80 and 110 times in a typical year, which is among the highest freeze–thaw exposure in the continental United States — more than Chicago, considerably more than Denver. Pair that with roughly 44 inches of annual precipitation, higher along the coast, and you have the conditions for the cycle that destroys masonry: water enters a joint, freezes, expands by about nine percent, widens the void it is sitting in, thaws, admits more water than before, and repeats. A joint that is open in November is measurably worse in April.
Flue gases contribute from the inside. Combustion products are mildly acidic, and on a chimney venting a gas appliance the exhaust is cool and wet enough to condense inside the flue, where the condensate attacks mortar joints from behind. Joints can therefore be deteriorating from both faces at once.
Finally, on the coast, salt. Air off Massachusetts Bay and Boston Harbor carries sodium chloride into the pores of brick and mortar. Salt in a pore cycles between dissolved and crystalline as the masonry wets and dries, and crystallisation generates pressure inside the pore. That pressure fractures mortar and brick without any freeze being involved, which means it works in August as readily as in January. Hull, Squantum, Houghs Neck, Quincy Point, Scituate Harbor, Cohasset's waterfront, Manomet and the North Plymouth shoreline all sit in that environment. It is additive damage, not alternative damage: those chimneys get the salt and the freeze–thaw both.
How to tell whether you need it
Most of this can be established from the ground with binoculars and, if you have safe access to a lower roof, a screwdriver.
- Mortar you can scratch out with a key. Sound mortar resists a screwdriver tip. Mortar that gives up sand and crumbles under light pressure has lost its binder and is no longer sealing anything.
- Visible gaps, recesses or open joints. If you can see shadow lines where the joint should be flush with or just behind the brick face, water is getting a straight path into the chimney core.
- A hollow sound when joints are tapped. This usually means the outer mortar has separated from the material behind it, so the joint looks intact and is functionally open.
- Efflorescence — white chalky deposits on the brick. Salts carried out of the masonry by water passing through it. It is not a stain to be scrubbed; it is evidence of water movement through the wall.
- Sand or mortar grit collecting on the roof, in gutters or at the base of the chimney. The joints are shedding material.
- Interior water staining near the chimney breast. By the time open joints show up inside, a good deal of water has already been through the structure.
Spalled brick faces alongside any of the above changes the conversation. Once the brick is losing material, repointing alone may no longer be the whole answer — see brick replacement and rebuilding.
What happens if it is left
Open joints are not a cosmetic problem that gets slightly worse each year. They are a bulk water entry path into the core of the chimney, and the core is where the expensive components are.
Water that gets into the chimney through open joints saturates the masonry from the inside. One hard winter with genuinely open joints can drive water deep enough that a freeze pops the faces off several courses of brick simultaneously. That is the transition point, and it is abrupt rather than gradual: a chimney that needed six hundred dollars of repointing in October can need a partial rebuild by March. The same water runs down onto the clay flue tiles, collects in the tile joints and cracks them, which converts a masonry maintenance item into a combustion safety item, because a cracked liner can let flue gases — including carbon monoxide — into the chimney structure and from there into the house.
Three to five years of deferred repointing on the South Shore very commonly produces a partial or full rebuild. The ratio is not subtle. Repointing a whole chimney is a four-figure job at the top end and usually less. Rebuilding the section above the roofline starts where repointing stops and goes up from there.
How the work is actually done
- We establish the age of the masonry and what it was laid in. Before anything else we need to know what we are matching. The construction date of the house sets the expectation — pre-1940 means lime mortar until proven otherwise — and a sample of the existing mortar confirms it. We look at colour, at sand size and colour, at how the material behaves when it is worked, and on historic properties we take a sample for matching rather than eyeballing it on the roof. This determines the mix, and the mix determines whether the repair protects the brick or damages it.
- We work out how much of the chimney actually needs doing. Deterioration is rarely uniform. The top several courses and the north and east faces usually go first, because that is where the weather lands and where the crown has been letting water in. Spot repointing of the top five to eight courses is a genuine repair, not a half measure, when the rest of the stack is sound. We would rather quote the smaller job and be right than repoint everything and charge you for joints that were fine.
- We rake the joints out to depth. A minimum of three quarters of an inch, and deeper where the mortar behind is still soft. This is the step that is most often skipped, because it is the slow part. Mortar buttered over the face of a shallow scratch has almost no surface area to bond to, and it comes out in sheets within a few winters. We cut with a grinder or an oscillating tool, keeping the blade off the brick arrises, and clean the dust out of every joint before anything goes back in.
- We mix to match the original, not to match the truck. Type N on most pre-1940 work, pure lime on genuinely early masonry, and a harder modern mix only where the existing construction is itself modern. Colour is adjusted with sand selection rather than pigment wherever possible, because pigment fades at a different rate from the sand around it and a pigment-matched repair looks right for about four years.
- We pack the joints and tool the profile. New mortar goes in tight, in lifts on deep joints, worked hard enough to fill the void completely rather than bridging it. Then the joint is struck to the original profile once the mortar has taken its initial set. Getting the timing of that right is most of the craft in this job.
- We protect the cure. Lime and lime-rich mortars want slow, damp curing and will fail if they dry too fast in sun or wind, and any mortar wants temperatures consistently above about 40°F. Depending on conditions that means damp burlap, shading, or simply not starting the job. From roughly late November through March we will usually tell you to wait for spring rather than take your money for work that will not cure.
- We deal with the crown and the cap in the same visit. There is very little point repointing a stack while the thing at the top of it is still delivering water into the masonry. If the crown is cracked or the cap is missing, that work belongs in the same scope, and it is cheaper done off the same ladder or staging than as a second visit.
What this costs on the South Shore
These are realistic Eastern Massachusetts ranges, published so you can check any quote you are given against something, including ours. What moves the number is height, the total joint area being cut, access — whether a ladder will do or the job needs staging — and the mortar specification. Historic matching genuinely costs more because the mix is slower to work with, the material is dearer, and the matching takes time. Spot work on an accessible stack is two to four hours. A full repoint on a large chimney is one to two days.
How often a South Shore chimney needs repointing
There are two answers, and which one applies to you depends mostly on how far you are from the water.
Inland South Shore properties — Abington, Rockland, Whitman, Hanover, West Plymouth, the interior parts of Pembroke and Norwell — generally run 15 to 20 years between repointing cycles, and mortar joints on an exposed chimney typically need some attention every 15 to 25 years depending on the quality of the original work and how sheltered the stack is.
Coastal properties are on a shorter clock. Where salt loading is part of the picture — Hull above all, but also Squantum, Houghs Neck, Quincy Point, Scituate Harbor, Cohasset's waterfront, Manomet, White Horse Beach and the Plymouth shoreline — the realistic interval is 8 to 12 years. That is not a sales figure, it is the consequence of salt crystallisation working on the joints year-round in addition to everything the weather does. Hull in particular has water on three sides and the fastest masonry deterioration on the South Shore; chimneys there need looking at on a maintenance schedule rather than when something goes wrong.
If you are on the coast and your chimney was last repointed more than a decade ago, it is worth a look even if nothing appears to be wrong from the ground. Catching joints while they are merely receded rather than open is the difference between a repoint and a rebuild.
What repointing will not fix
We would rather say this before you pay us than after.
Repointing does not fix a failed crown. Water coming in through the slab at the top of the chimney will carry on coming in through freshly pointed joints, and it will attack the new mortar from behind while it is still green. If the crown is cracked through, that is crown work and it comes first or at the same time.
Repointing does not fix flashing. If your water shows up on the ceiling during rain rather than after it, the entry point is very likely the roof-to-chimney junction, and no amount of mortar thirty feet up will change that. That is leak and flashing work.
Repointing does not fix a chimney whose brick has already gone. Where several courses have lost their faces, pointing between deteriorated bricks is money spent in the wrong order — those units need replacing, and past a certain density of damage the correct repair is a partial rebuild.
And repointing is not waterproofing. A sound repointed chimney still absorbs water through the face of the brick, which on an exposed coastal stack can be a meaningful load. A penetrating, vapour-permeable water repellent applied after the mortar has cured is a cheap addition to a repointing job and a poor substitute for one.
What people ask about this job
What is the difference between tuckpointing and repointing?
In practice on the South Shore, nothing. Both terms are used for cutting out deteriorated mortar and packing the joints with new mortar. Historically tuckpointing described a specific decorative technique using two mortar colours to give the illusion of very fine joints in rough brickwork, but almost nobody means that today. If a quote says one and you said the other, you are talking about the same job. What actually matters in the quote is the depth the joints will be cut to and the mortar type being used.
Why does the type of mortar matter so much on an older chimney?
Because mortar must always be softer than the brick it beds. Brick fired before roughly 1940 is soft and slightly flexible, and it was laid in soft lime-based mortar so that movement and moisture would be taken up by the joints. Modern Type S or Type M Portland mortar is much harder and nearly impermeable. Used on old brick it blocks the joint as a drying path and forces movement stress into the brick face, which spalls. Type N or a pure lime mortar is normally the right specification for pre-1940 New England work. This is the question worth asking any contractor quoting on an older chimney.
How deep should the joints be cut out?
Three quarters of an inch is the accepted minimum, and deeper where the material behind that depth is still soft. The reason is bond area. New mortar needs enough surface contact with the brick above and below to key in and stay put. A shallow surface skim has very little bond area, no mechanical key, and it typically debonds and falls out in sheets within a handful of winters. If a contractor is quoting a price that only makes sense for surface work, ask what depth they are cutting to.
How often does a chimney need repointing on the South Shore?
Inland, generally 15 to 20 years, and mortar joints on an exposed chimney typically need attention somewhere in the 15 to 25 year range depending on the original work. On coastal properties — Hull, Scituate, Cohasset, the Quincy peninsulas, the Plymouth shoreline — the realistic interval is 8 to 12 years, because salt crystallising in the pores of the mortar fractures it year-round in addition to the freeze–thaw damage everyone gets.
Can repointing be done in winter?
Generally no, and anyone who says otherwise in January is not doing you a favour. Mortar needs temperatures consistently above roughly 40°F to hydrate and gain strength properly, and a joint that freezes before it has cured is permanently weakened even though it looks fine. Lime mortars are fussier still, wanting slow damp curing. From late November through March we normally recommend waiting for spring. If water is actively getting in, there are temporary measures — sealing the crown, capping the flue — that will hold a chimney through the season without compromising the permanent repair.
Will repointing stop my chimney leaking?
Only if open joints are where the water is coming in, and often they are not. The five usual sources of chimney water entry are failed flashing, a failed crown, deteriorated mortar joints, porous unsealed masonry and a missing cap. Flashing is the most common single cause. The useful diagnostic is timing: water appearing during rain points to the roofline, water appearing hours after the rain has stopped points to the top of the chimney. We would rather diagnose it properly than sell you a repoint that does not solve your problem.
Often needed alongside this
Chimney Rebuilding
When the brick faces have popped off and the stack is past patching, we rebuild from the roofline or from the footing.
Read more →Chimney Crown Repair
The concrete slab on top is the first thing our winters destroy, and the first thing that lets water into the brick below.
Read more →Chimney Waterproofing
A vapour-permeable repellent that stops wind-driven rain soaking into the masonry, without trapping moisture inside it.
Read more →Get the mortar looked at before the brick goes
Tell us what you are seeing and we will tell you what it is likely to be, what it will take to fix, and roughly what it should cost — before anyone climbs on your roof.
Prefer to talk it through? The phone is answered around the clock, by a person, including during storms.
We work across Quincy, Braintree, Weymouth, Hingham, Milton, Hull, Cohasset, Scituate, Norwell, Marshfield and the rest of the South Shore.